This post will cover the mechanics of the upgrade procedure from NSX 6.2, in this case 6.2.4 specifically, to NSX 6.3.1. Much of the look and feel is similar to the previous versions but we'll show the process in full - step by step. We have so many new customers I want to make sure they see the process beginning to end. Certainly the official upgrade document should be reviewed in addition to this post. It can be found here.
The first step is to login to the NSX Manager.
From the home page navigate to the upgrade page.
You'll see the current release and see an Upgrade button on the right hand side of the page.
Next, find the .OVA file and upload it.
The system will upload the file and verify it isn't corrupted.
Once this is complete, you'll see the following screen where you can select a few things - enabling SSH to the NSX manager (say yes if you don't know - NSX Central CLI is good stuff!) and authorization for "CEIP". Participate if you can, but some corporate policies may prohibit it.
The upgrade will progress and depending on your system speed, may take some time.
Once complete, the NSX Manager will reload and come back to the login page. Login and you can see the new version information, and the first inkling of a new NSX 6.3 feature, FIPS mode.
Now that NSX Manager is upgraded, we can go upgrade the rest of the NSX components and this is accomplished via the NSX GUI in vCenter Web Client. First thing to do is check the health of your system and we've made it easier for customer in NSX 6.2 and even easier in NSX 6.3 via the Dashboard.
Assuming everything is healthy, go to the Management tab click on Upgrade Available to get the controllers rolling. my setup is a home lab, so only have one controller but you'll have three in your network.
You'll see three states - Downloading, Upgrade in Progress, and Rebooting, After the controllers reboot You'll be set to proceed.
Next, go to the installation tab and start with the Host Preparation tab and you can see the Upgrade available. Click on the Upgrade available tab next to the cluster you want to start with. You'll be asked to verify your selection.
This can take some time we the upgrade rolls across the hosts. The hosts will be rebooted to load the new VIBs so plan accordingly.
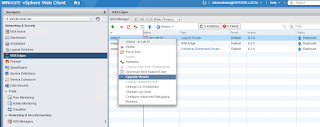
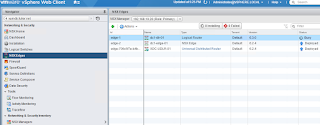
The last step is to upgrade the Edges. You'll see the Blue Upgrade arrow so click on it and watch the upgrade roll. Note this will be disruptive as well, so plan accordingly!
With that, you've upgraded NSX to 6.3.1 and now have the platform to do a lot of awesome things. I am excited about this release and can't wait to share some of the nuggets of the features we added and enhancements to existing processes with you all.


No comments:
Post a Comment